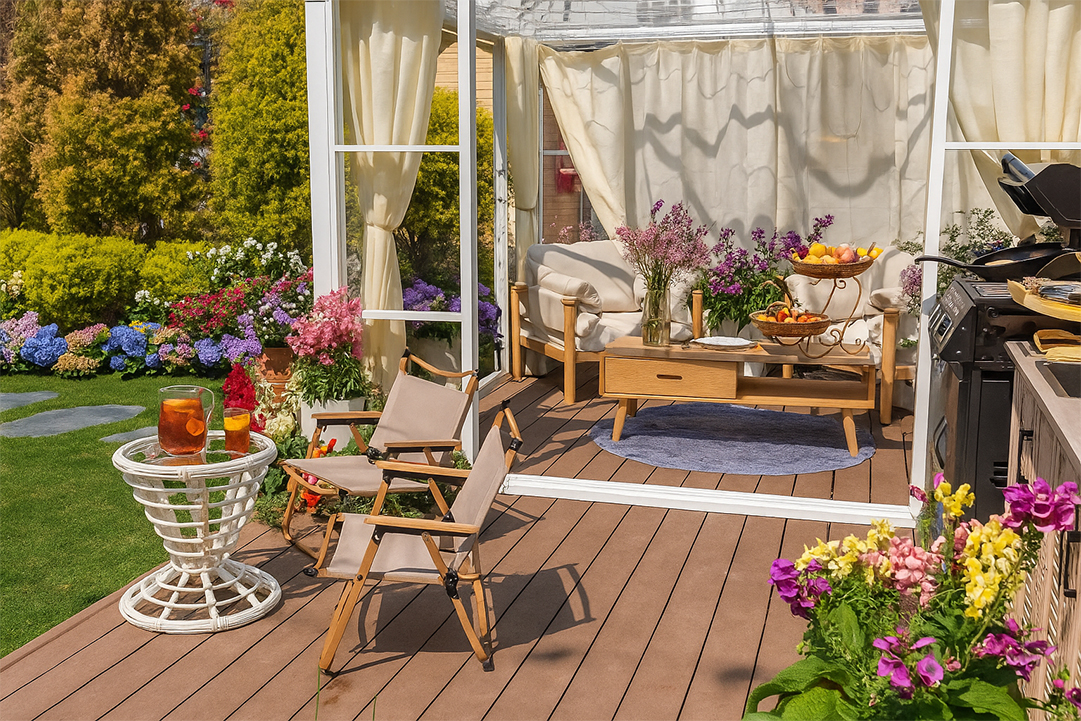
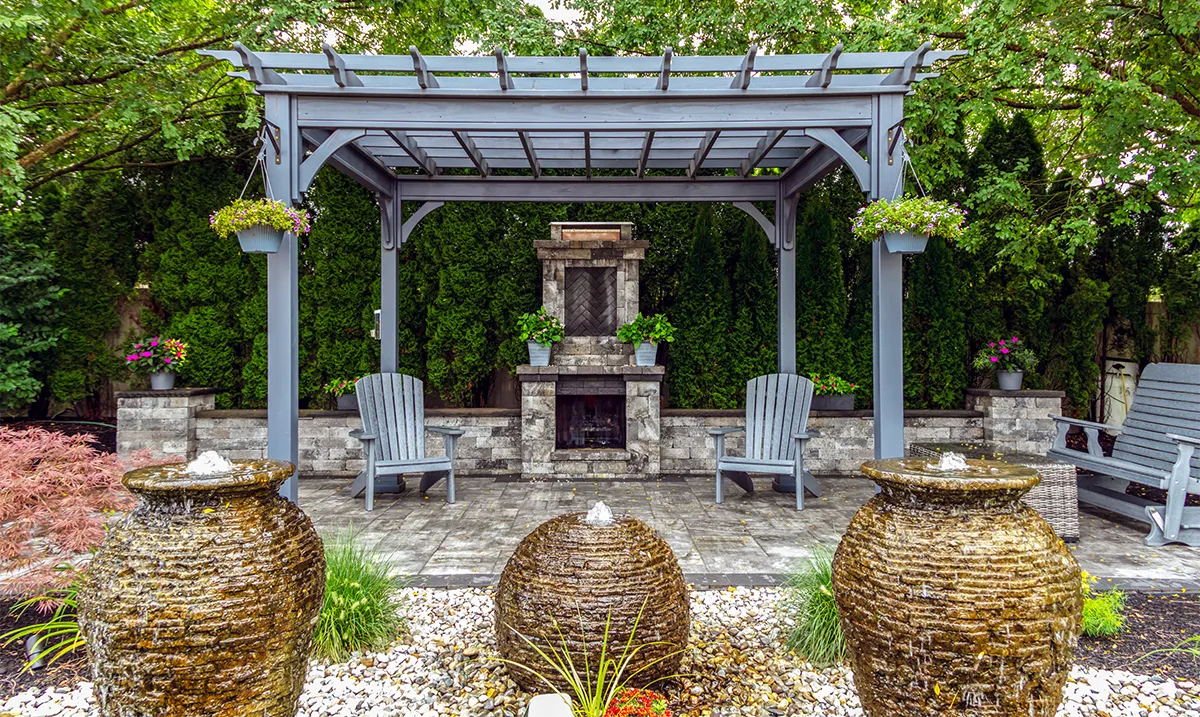
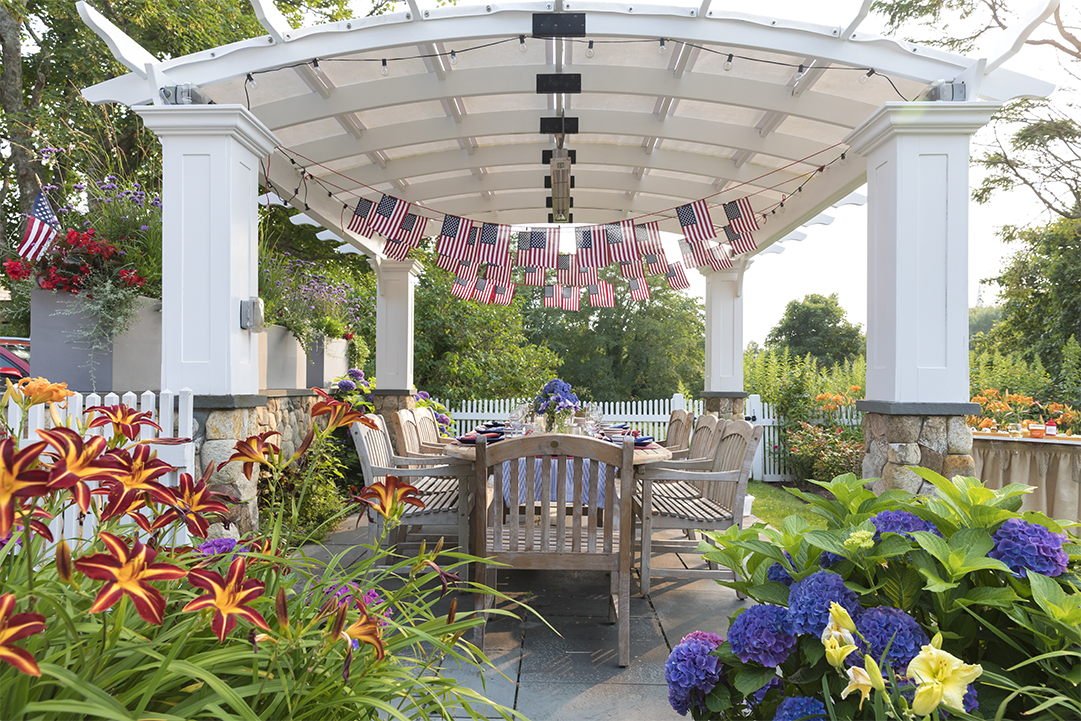
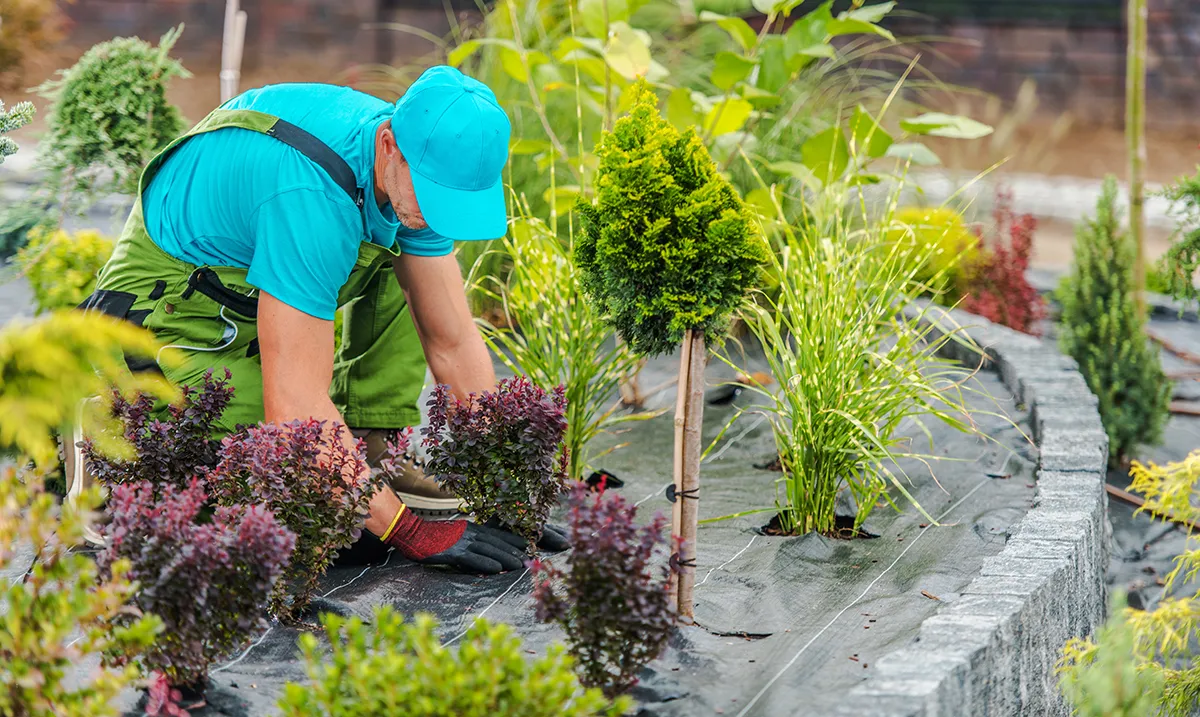
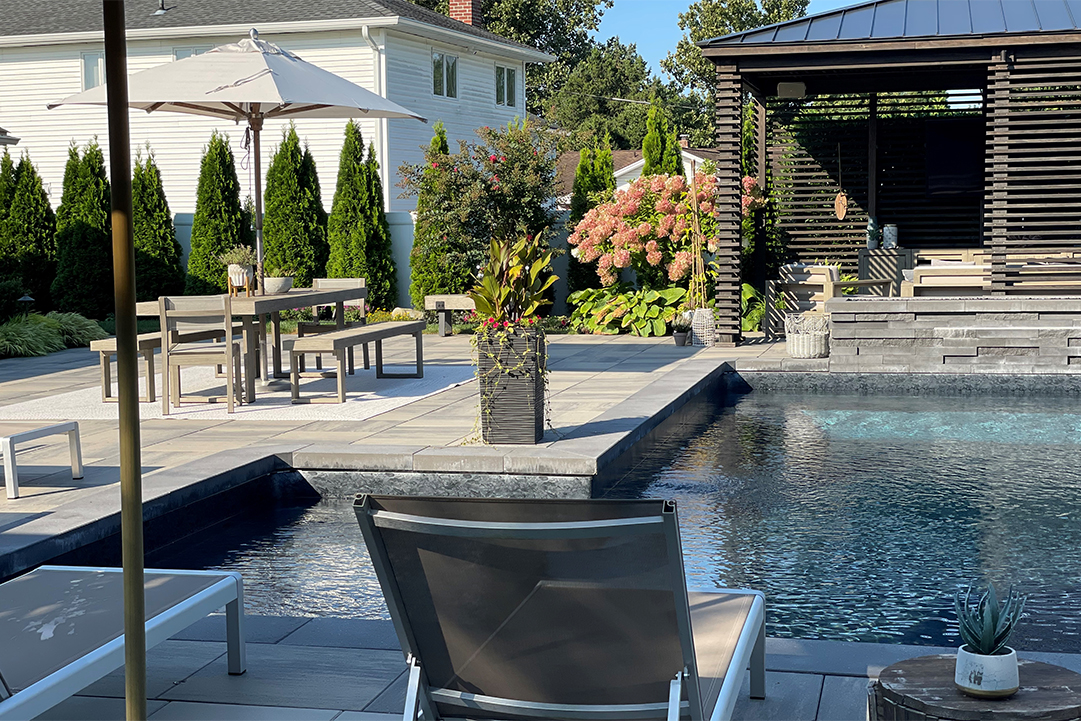
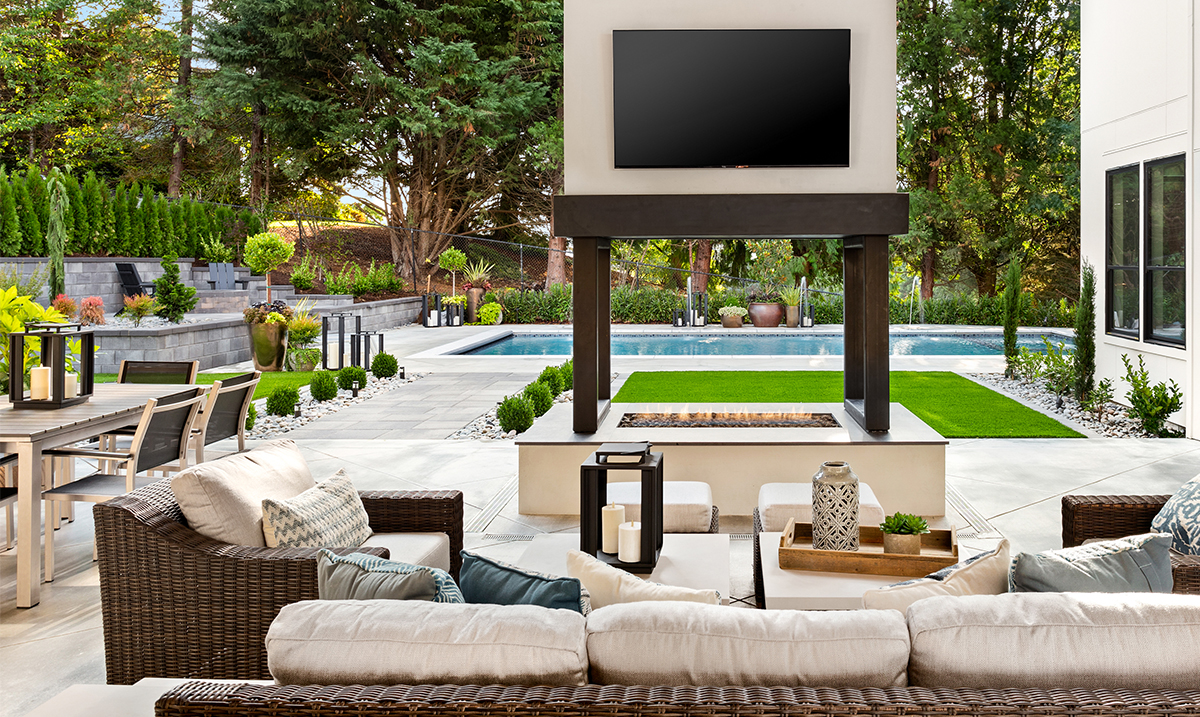
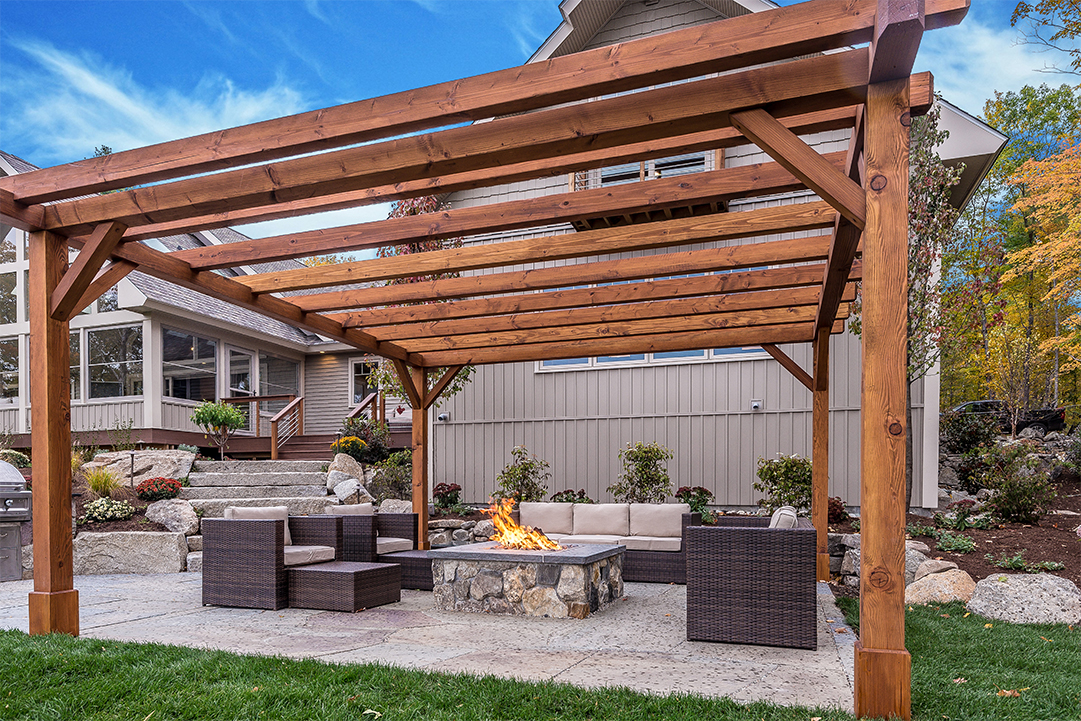
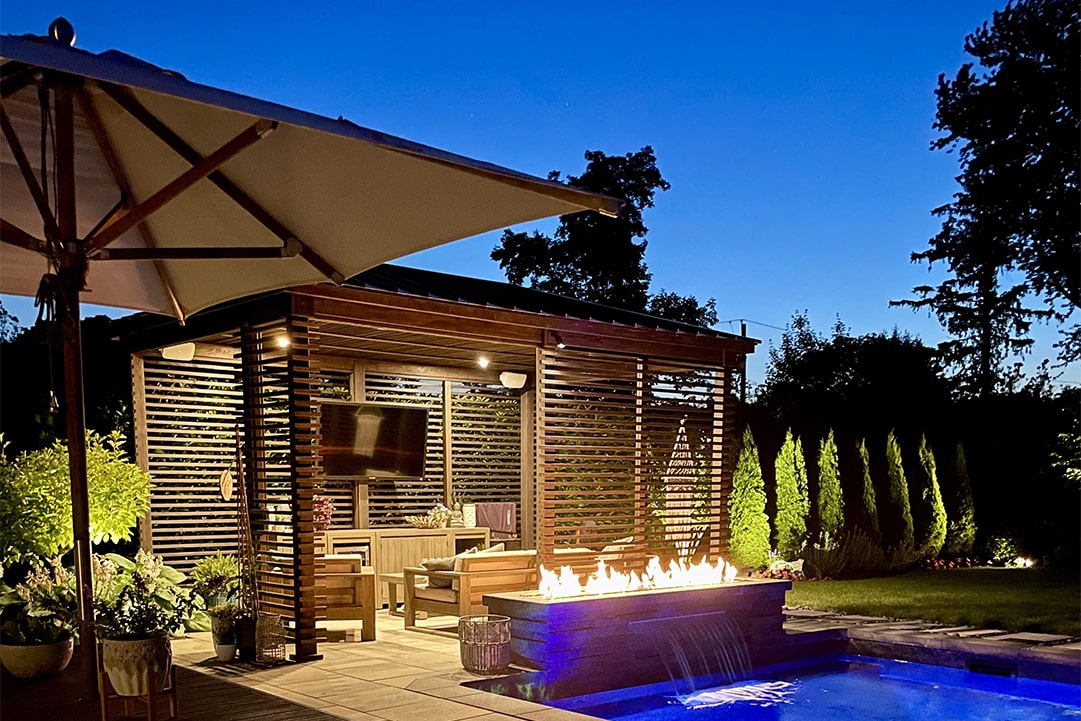
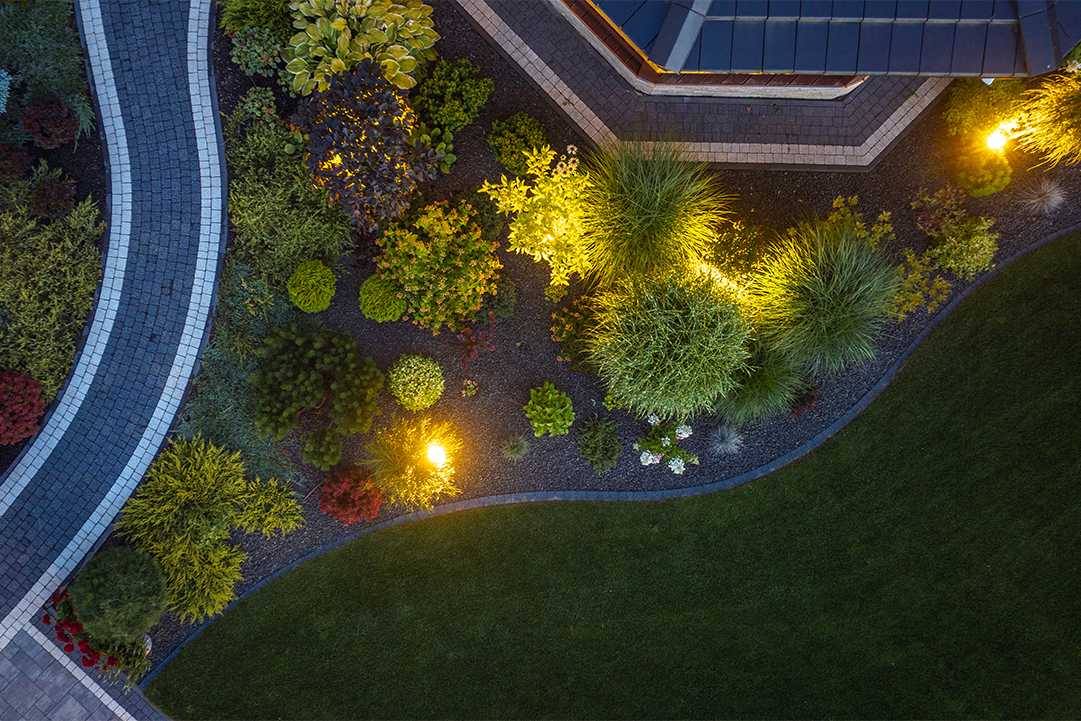
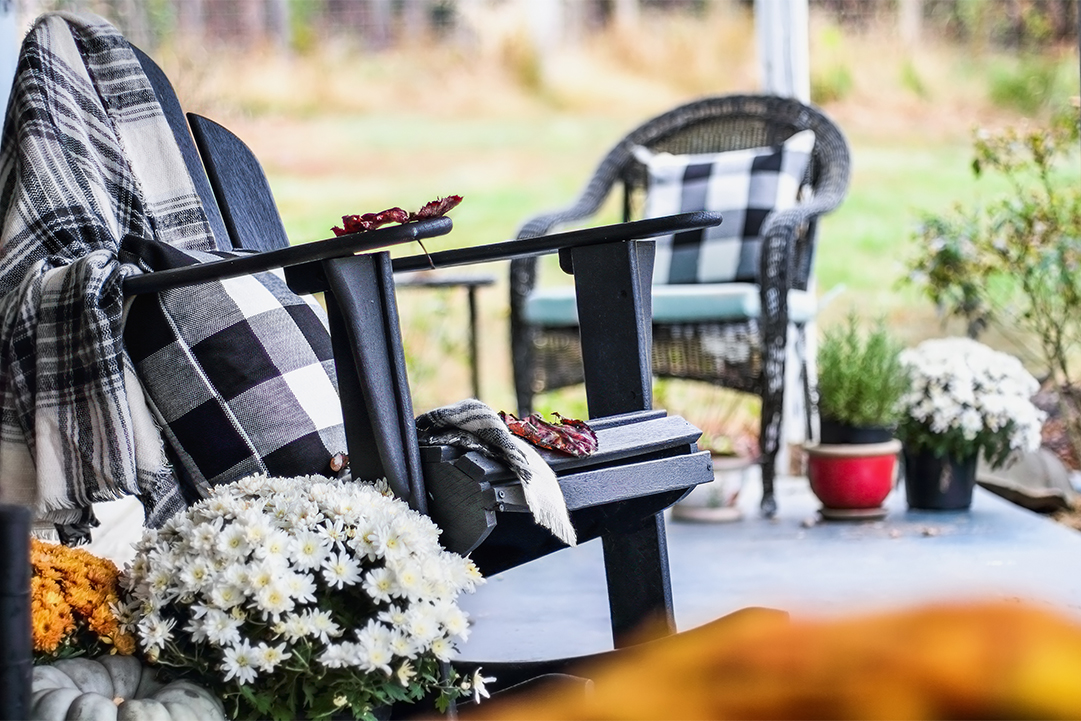
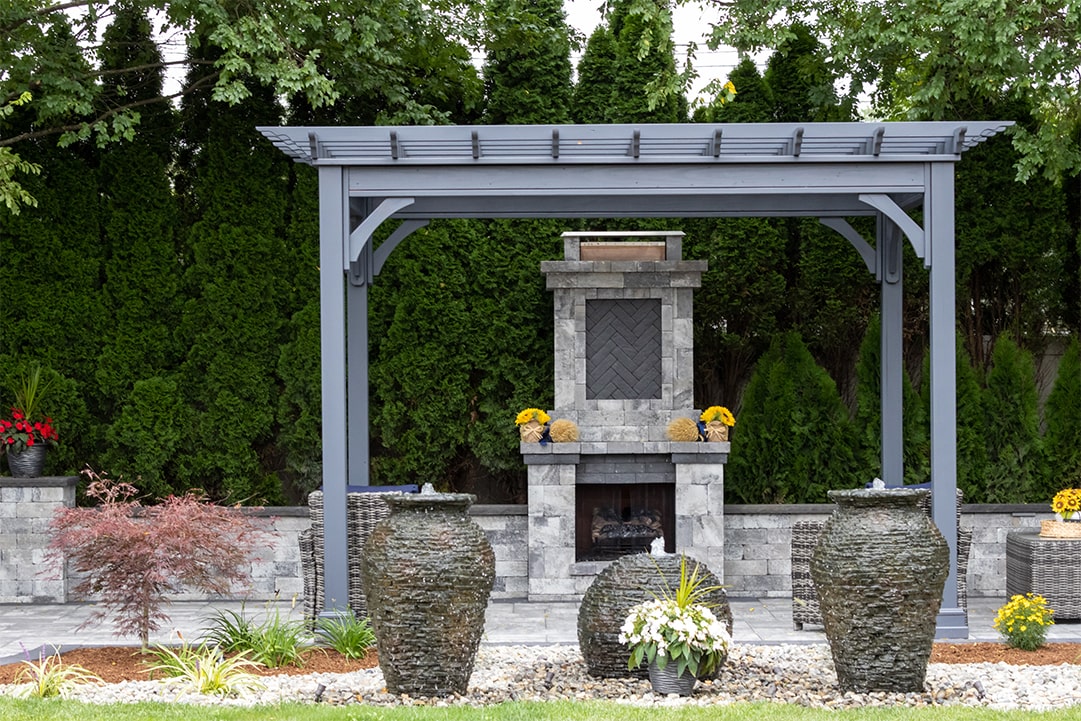
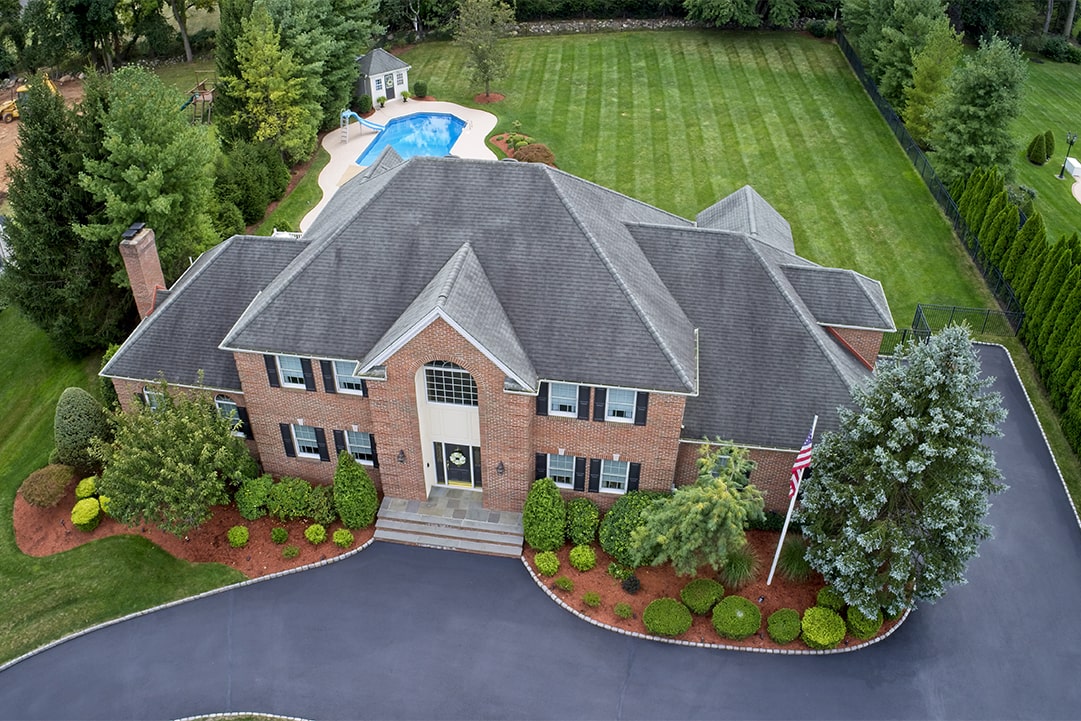
Improving the look and feel of your home – Curb appeal

NJ Landscape Designer

NJ Landscape Designer

Maybe you are planning to sell your home. Or maybe you are just tired of the same look when you pull in the driveway. You can give your home a fresh look – a “facelift” if you will, without spending a lot of money. Improve what realtors call “curb appeal” with these tips we share below. And remember, when your home looks better – you are happier. (So is a potential buyer.)

The Porch-Does your porch need painted? Strip it, stain it, paint it – give the kids a project, enlist the family’s help. When a group of people tackles painting or staining a porch or deck, it’s not a daunting task. It will go faster and everyone can enjoy the effort. Play music, whistle while you work, and reward the gang with a pizza party or some other treats when the job is done! Don’t have kids to help you? Spread the word around your neighborhood or among friends and find a college student or two that could use some cash. They will accept much less pay than a specialized company to do the same job. And you’re contributing to their education! You may also find that someone in your circles is out of work, and would love to help with home improvements for a low price.

Another way to spruce up the front porch – hang a windowbox or two! Your landscape and garden expert can suggest the best plants/flowers for the boxes, to have nice looking windows all year. In wintertime, you can add greenery, pine cones, battery candles, fake fruit or vegetables and other decorative items that keep the boxes festive and colorful when the flowers can’t bloom.

An Arbor
Find a spot in the front yard, side yard, or near the front porch or entrance to place a trellis or arbor. These can be purchased from your home and garden supplier. Your landscaper can plant the right viney plants to take hold and spread over the trellis or arbor – possibly a blooming vine if that’s what you prefer. These look lovely and add instant appeal to a “blah” or barren area of the yard.

Line the Driveway
What’s along your driveway? Dirt? Pebbles? Nothing? Have your landscaper place some nice edging along the drive that you pick out. Or if you are a do-it-yourselfer, purchase it and have at it! You can also place mulch or some type of rock or pebble along the edging, making a ‘row’ as wide as you like, then place edging on the other side.

Want to add some color?  Every 5 or 10 feet, add a large potted plant or shrub. This method of lining the driveway makes it look very nice as you approach your home and pull in. Pavers, bricks, and uncommon types of mulch or ground cover can also be used. Need ideas? Not sure what to put down? Ask your landscaper.

In an upcoming article, we’ll share even more ideas for improving curb appeal AND creating an inviting back or side yard area. Until then, happy planning, painting and planting!

Posted in General | Tagged | Leave a comment

Sun or Shade – which plants to use: Part Two

In Part 1 of this series, we talked about the best plantings for shady areas. If you have a sunny yard, congratulations! Gardening in sunny spots is easier because of the huge variety of plants that grow well under sunny conditions. In the previous article, we went over some of the factors to consider when selecting plants, and you can always ask your landscaping professional for suggestions.

Once you’ve considered the general surroundings in which you live, it is time to think about the actual spot where you garden. Each and every garden will consist of plenty of different microclimates. A microclimate is an area within your garden or yard that is different from the general overall conditions in your region.

Do you have a bed along your home that stays warmer than surrounding areas? Do you live near the ocean and have areas that are sometimes sprayed with saltwater? Do you have a spot that tends to stay wet or cooler than anywhere else? Do you have an area that is sheltered from the wind? There’s a myriad of factors that contribute to microclimates. Being attentive and learning what your microclimates are will help you identify the plants that will do best for each spot in your home garden. It can also help you find a spot where a plant that you didn’t think you could grow will prosper.

The primary thing that you have to worry about in a sunny garden is that your plants are getting enough water. Here are some of the top plants to use in heavy sun areas:

*  Roses: Almost all roses need at least six hours of sun a day to bloom their best, so roses are ideal for all your sunny spots. Most people think that roses are hard to grow, but they don’t have to be. An easy way to give your roses a boost is to plant your empty banana peels around the bushes. Bananas have potassium, which is as nutritious for roses as it is for people. Roses that are well-nourished will produce more, larger blooms with stronger perfume, which is always crowd pleaser.

*  Butterfly Bush: A perfect choice for lawns and gardens, butterfly bushes are very tolerant of heat and humidity. They flourish in difficult conditions like very sunny spots and have tons of beautiful blooms, which can vary in color from blue to lavender, pink to red, and even white. As you’ve guessed from their name, they also invite butterflies and bees to your garden, which is fun for both children and adults.

*  Daisies: There are few flowers as cheery as daisies. A mass planting of daisies in bloom is certain to bring a smile to anybody’s face, and they are ideal additions to any sunny garden. For the flowers to bloom more than once a season, just cut off the bloom once it has faded, a practice commonly known as deadheading. You can also just cut the flowers when they are in bloom and enjoy them inside the house.

*  Lilies: Another great bloomer for your sunny garden area is the lily. There are numerous varieties of lilies available today, from the typical tiger lilies to deep purple Black Jacks, yellow Flamboyants, pink lilies called Spanish Flame, and even delicate lilies that look like orchids. Lilies are planted from bulbs, which makes them very easy to care for. Plant one time and you will have blooms for a long time to come.

*  Lavender: A great choice for a sunny walkway is the lavender plant. Lavender looks great in bunches and rows, such as along a sidewalk. You might consider placing the plants so that people run into them as they walk to your house; this will release the fragrance of the flowers. Lavender is drought-tolerant and the flowers are great for drying, using in crafts, and cooking. They add a useful touch as well as beauty to any sunny garden.

There are many other plants that to choose from that would fit in well in your sunny garden, but these five superstars are a great way to begin your adventures in gardening in the sun. If you have partial shade, it can affect your planting choices as well, and we’ll cover that in a future article.


Posted in Uncategorized | Leave a comment

The Right Plants for Sun or Shade: Part 1 –Shade-Happy Plantings

You can make your gardening life a lot simpler by choosing the right plants for certain areas in your garden or lawn.

In this two-part article we’ll cover the basics on how to choose the right plants for your garden based on sunny or shady areas and also list some of the top plants for those areas.

The idea behind selecting the right plant for the right place is that when you pick plants that are well-suited to the location where they are planted, they will perform well with limited additional work. Plants that are ideal for their site will establish themselves quickly, and have strong roots.  Healthy plants growing in ideal conditions will be less likely to become diseased. The same way we are less likely to catch a chill if we are well-rested and healthy. They are also less likely to be adversely affected by insects. If a few insects chew on healthy plants, the plants are likely to shrug off the injury and keep on growing and flowering. If unhealthy plants are chewed by insects, the plants have less energy to deal with the invading pest and will be more likely to die.

So how do you pick the right plant for the right place? It’s simple; first you assess your local conditions, not for your garden, but the general surroundings. Do you have long, hot, humid summers? Are they hot, but dry? Do you have chilly nights, even when the days are hot? Do your conditions tend to be wet, dry or somewhere in between? Also think about what plants grow in your area naturally. It makes sense to think about native plants, but you needn’t limit yourself to them.

Below is a list of plants that thrive in shady areas. Low-Light Plants include:

*Impatiens

Ideally, impatiens receive partial to full shade. This allows the plant to produce gorgeous flowers in a medley of heights and intense colors, including white, red, dark pink, light pink and orange. Impatiens are beloved because they’re not only pretty, but also easy to care for. Glossy leaves make it attractive even when it’s no longer in bloom. Water impatiens regularly, but make sure soil is just moist — not too wet. Use rich soil and apply a general-purpose fertilizer once a month. Impatiens are susceptible to frost, so bring potted ones indoors or cover the ones planted in your garden when temperatures drop too low for their liking.

*Begonia

Fitting for flower beds, hanging baskets, pots or even indoors, begonia is an incredibly adaptable plant. You can find this flowering plant in red, white, yellow or pink, depending on the variety. All types of begonia grow dense foliage and reach between 6 inches and 9 inches in height. Waxy green or chocolate-brown leaves give this plant appeal even when it’s not in bloom. Begonia hates frost and love shade. Unlike some other plants on this list, it does best with a little care and attention. Remove dead leaves, stems and flowers. Water generously, but allow its soil to dry before watering again. Ensure that soil stays loose, and add fertilizer once a month.

*Wild Violet

Don’t mistake this plant for the common African violet that’s a popular indoor/outdoor plant. Truly wild violets always live outdoors. This hardy perennial does well in intensely shaded areas and can pop up in the most unexpected spots, such as the dark crevices of a forest floor, among prairie grasses and even in wetlands. Wild violet is sweet-smelling, and it tastes sweet, too! Use the well-washed blooms in salads, or crystallize them with sugar to decorate desserts.

The coloring of this plant can range from the palest purple to the deepest blue, and the spectrum also includes oranges, pinks, whites and other brilliant colors. Wild violet emerges in early spring, and it prefers well-drained soil abundant with decayed manure and organic matter.

* Hosta Lily

The hosta lily is more alluring for its broad, showy leaves than for its small white or lavender flowers that bloom on long stalks shooting up from the plant. Green, blue, golden and variegated leaves bring interesting textures and colors to shady areas of the yard. Once established, the hosta lily doesn’t need much pruning. It prefers partial to full shade and grows between 18 inches and 30 inches tall and 2 feet to 4 feet wide. The hosta lily should have nutrient-intense soil that’s constantly moist. After the first frost, cut back the plant down to ground level. Either cover the plant crown with a 3-inch bed of organic mulch to prepare it for the following season, or let the plant naturally die back. If this is your preferred method, cut back dead growth the following spring before new shoots come up.

As you think about each of these plants make a few notes on each of them, this will help you plan what plants should go in each place. If it’s bushes and shrubs you want to plant in shade, ask our landscaping professionals to make suggestions for you! In our next article, we’ll go over some of the top plants for sunny areas that love to soak up the rays!


Posted in Uncategorized | Leave a comment

What Causes Snow?

Every winter, we watch our once green grass wither and turn brown and all the leaves fall off our shrubs. When we look out our window at our lawn, it does not look very pretty. That is—until the first snowfall.  Along comes some winter snow and blankets our lawn, bushes and trees in white. So what causes snow?

Snow forms within clouds so it won’t snow on a cloudless day. And snow needs a temperature below freezing. Snow clouds are full of moisture— saturated air that has condensed into a liquid much like the condensation you see on the outside of a cold glass of water. The warm air reaches the glass, becomes cold and saturated, and turns to liquid—the water beads on your glass. So within the cloud you have this condensed liquid and when the temperature falls below freezing, it turns into ice. It is interesting to note that the design of a water molecule leads it to develop into six-sided crystals. A snowflake is a bunch of crystals all stuck together. Picture these ice crystals joining until the snowflake is big enough—heavy enough—then it falls down toward the  ground. Gravity takes over and the heavier snowflakes begin to fall. Even in midair the snowflake will join with more crystals that it bumps into as it is falling.  When the temperature is right at freezing, snowflakes will be bigger because there are a little bit melty—a little bit wet and ‘sticky’ so the crystals they encounter will stick to them more easily. When it is extremely cold—far below freezing—snowflakes will be smaller and the snow is kind of dry. If you’ve ever tried to make a snowball or snowman and you can’t get the snow to mass together, this is why.

The snow clouds form when warm air flows up and over cold air.  And water vapor that is in the warm air mass, along with the movement of the air as it rises, makes clouds form. The more water vapor that is in and around the cloud and the stronger the updrafts that make the water vapor condense, the greater the chance of snow forming inside the cloud. This is why, in mountain areas, you’ll have snow and precipitation on one side of the mountain but the other side receives minimal amounts of snow. This is because as the air is forced to rise on the ascension side of the mountain, the water vapor forms and comes down as snow or rain.  By the time the clouds cross the mountain to the other side, there is hardly any moisture left in them.

One last interesting point about snow—it actually helps your lawn. It contains atmospheric nitrogen, which melts down into the ground as the snow melts, and this nitrogen improves your spring grass. Nature is pretty cool, isn’t it?


Posted in Uncategorized | Leave a comment

Enjoying the Outdoors – Even in Winter

Let’s face it—cold weather and snow make us want to stay indoors. Sometimes it seems like a shame to have a big yard, front porch, or outdoor courtyard—and only use them in warm weather months.

Here we share some ideas for enjoying the outdoors in cold weather and some cold weather activities that can bring couples or families together.

BUNDLE UP AND TAKE A HIKE

Invite your significant other, spouse, and kids if you have them – to take a walk and admire the winter scenery. Take photos of the snow on the trees. Try to capture a picture of a bird, rabbit, or some other winter scene like kids making a snowman. You can make a photo contest out of it and have a prize for the best photo – allow the group to vote on a winner.  You can enjoy a walk out in the countryside or in the town square – just drive to a place that has the scenery you are looking for, if you don’t want to walk near your home.

PLAN A FRONT PORCH PICNIC OR COOKOUT

String some lights on your porch or leave the Christmas lights up for an extra week or two. Bring out the camping lanterns or flashlights and candles. You can do this just with your family members or invite the neighbors—remember—they may be suffering from winter cabin fever as well and may be happy to be invited!

You can make it a potluck meal, so everyone just brings something. Place a tarp or plastic tablecloths on the floor of your porch or deck with sleeping bags or blankets on top. Throw some pillows out there, too. Let everyone sit around, eating and drinking and enjoying the crisp winter air. If the stars are out—even better. If someone feels spunky enough, they could fire up your grill. Nothing beats the smell of a charcoal grill cooking burgers or barbecue chicken on a cold winter night. You could also sit around a chimenea -  burn the small fire starting sticks to make a little flame inside it or just place several candles in it.

PLANT A WINDOWBOX

A fun project is to give each member of your family an empty window box. Get some potting soil and a variety of plants and flowers. Let each of them get creative with what they want to put in the window box. They can even decorate it for the season. During the cold weather, sit the boxes on the window ledge indoors. Then when the weather warms up you can move the window boxes outside.

YARD GAMES

Yes you can enjoy your lawn in the winter. Throw the football! If you have a two-story home, send everyone upstairs to look out the window while one or two members of the family draw something on the lawn in the snow, using their feet. See how long it takes you to figure out what they are drawing. Depending on how big your lawn is, you could have a competition and pick the best snow drawing. Or do it over the course of several weekends and take pictures of each drawing in the snow. This is a nice way to still use your lawn even in winter.

As these ideas demonstrate, the outdoors don’t have to be off-limits in winter months. As long as you dress appropriately and don’t allow yourselves to be out in the cold too long, you can have some fun with winter weather and enjoy quality bonding time with loved ones.


Posted in Uncategorized | Leave a comment

State Tree and State Flower – New Jersey

You may love New Jersey, but do you know the state tree and state flower off the top of your head? Interestingly enough each one of the 50 states in the USA has their own official tree and flower; among other official things like the state bird. For the most part, each flower and tree is native to that particular state or area of the country, but there are some flowers that have been chosen for their symbolic importance.

The state flower of New Jersey is the viola sororia, or more commonly known as the blue violet. In 1971, the garden clubs from across the state pushed for this flower to be marked as part of New Jersey’s culture. This flower is native to this area of the country and its most unique characteristic is that these violets produce many buds after they have already bloomed. Violets also are a popular ingredient among bakers and cooks. Some jellies, candies, and salads include violet petals and interestingly, they are filled with vitamin C! In many places the gift of violets is considered a symbol of a good future/prosperity.

For future reference, be very careful not to destroy or move state flowers and trees if they are not on your own property. Be aware of this in any state, because it is considered a “crime.” Many states have in depth laws about issues like this, and in many places there are large fines associated with removal or destruction of certain trees and plants.

The state tree in New Jersey is considered the red oak, or its scientific name: quercus borealis maxima. This was chosen and added to the New Jersey legislature in 1950 after Governor Alfred Driscoll authorized a joint resolution for this event. Mostly, this hardwood tree is recognized by its pointy leaves and the vibrant red of these leaves in the fall. It is also believed that the Native Americans relied heavily on acorns from these trees as part of their diet. What is also interesting about the red oak is that on the first designed Medal of Honor for the US Armed Forces there was what is thought to be a red oak leaf depicted. The red oak is a very significant timber tree, and one of the largest.

As you can see, there truly is a lot more meaning behind state trees and flowers than you may think. These state designations are part of what makes our country so unique. There are various other symbols for most of the states such as a state flag or state animal, but many also add other things like dances or whatever they feel is a good representation of the state’s population. Now did New Jersey coin the phrase, “the acorn doesn’t fall far from the tree”? We couldn’t find any documentation to support that, but it’s possible!


Posted in Uncategorized | Leave a comment

Safety This Season

Winter weather takes its toll on grass, trees, plants and animals. But it can also be hazardous even to us humans. We enjoy being out in the cool crisp air and we still need to stay active in the wintertime. We may even need to occasionally do a little bit of yard work and preventive maintenance around the outside of our home during these cold months. So it is important to protect yourself from the elements and prevent wintertime woes.

To stay warm and dry and safe all season, follow these pointers from your friendly neighborhood landscaping and garden business. We are outside a lot—and we know how to deal with snow and ice!

The first tip is simply to dress appropriately—wear enough warm clothes and layers. You can always remove that vest, scarf, hat or gloves but wear them in case you need them. If you are doing outdoor chores, you can get overheated because you’re wearing all these heavy articles of clothing. Rather than take them off, loosen them and just work slowly. Do not exert yourself. Very importantly, avoid getting wet.

When your body is exposed to low temperatures, it loses heat at a faster rate than it can produce heat. Once you’ve been out in the cold for a long time, your body will use up its stored energy. This can lead to a condition called hypothermia which is basically an abnormally low body temperature. If you become wet in cold temperatures, your likelihood of getting hypothermia is increased. So try to get into dry clothes as quickly as possible.

As a rule, you should not exert yourself in cold weather. If you begin to shiver continuously, don’t ignore it. It means your body is losing heat and you need to get back indoors. So if those chores around the lawn, porch, driveway, and roof of your house have you itching to get them done—slow down. Do one task at a time and come indoors frequently.

Frostbite can set in also. It usually affects your extremities. If you feel tingling in your fingers, nose, ears or chin—you need to warm up very soon. Frostbite can cause permanent damage and if you already have poor circulation it is a real risk.

Do you take winter walks? If you do, take a buddy with you or at least the family dog. Always let someone know where you’re headed so that if an unfortunate accident should occur, people know where to look for you. If you are ever stranded in a vehicle, it is best to stay in your car until you are found rather than face the elements outside of the vehicle. Practice safe driving to avoid crashes and running off the road—this means not driving when roads are icy and avoiding bridges and overpasses. If you must drive over them, go very slowly.

Hand warmers and pocket warmers are your friends. Keep them in supply during cold winter months and use them if you are going to be outside for longer than 45 minutes. Stock up on flashlights, batteries, fuel, firewood, and other things you might need should there be a power outage. Staying prepared is half the battle to staying safe this winter.


Posted in Uncategorized | Leave a comment

Cost Saving Tips

Plan Now for Less Work in the Spring and Summer – and less expense!

So you would like to improve your landscaping but you don’t have thousands of dollars to spend. There are things you can do to improve your lawn and other landscaped areas around your home without breaking the bank. We give you several ideas here.

First—stop spending money on weed killers. Letting some weeds grow creates diversity, as well as giving bugs something else to eat besides your prize roses. Pull the weeds that are unattractive or have stickers or partners but let a few of them stay.  Many landscape experts believe that diversity in plant life maintains a healthier soil and lawn.

Have you heard the term, hard scaping? This refers to placing inanimate objects in your lawn and garden that look nice, take up space, but do not require watering, pruning, fertilizing, etc. In other words, once you have installed a stone walkway, some brick pavers, a fountain or a bird bath, that area will not need continuous labor and expense like green spaces do. Put pea rock or gravel in a square or circular area about 6 to 8 feet in diameter, and outline it with bricks or edging. Sit one large potted plant in the middle and you’re done!

Capturing rainwater is another way to save money that seems obvious but few people do it.

You can also purchase and install cheaper plants and shrubs. Your landscaping professional can tell you which plants and shrubs cost the least and which ones require the least amount of work and products to maintain. For example, a potted cactus surrounded by pea rock.

Trade cuttings to save expense. If you don’t currently converse with your neighbors on your street, this gives you a reason. Knock on the door or leave a note in their mailbox and ask if they’d like to trade cuttings of plants and shrubs. We all pull small newly sprouted plants and even trees out of the ground to toss them away, when we have an overgrown area. Well, one man’s trash is another man’s treasure. That new spider plant or jasmine that you already have several of and plan to toss away could be a new plant for someone else! There is a root powder you can get from your landscaper that helps cuttings take root and grow.

Another cost cutter for the lawn and garden: Hire yourself. Get the family engaged in a beautification project. Make it a contest by giving each of them an area of the front lawn or backyard to improve.  Give them a limit to spend, and see what they do with it!

Last but not least, check with the city where you live. Municipalities sometimes give away things like mulch, tree cuttings, sand or soil, and other landscaping materials. Look into it and you may be surprised what you can get for free or cheap. Happy hunting!


Posted in Uncategorized | Leave a comment

FALL GARDENING TIPS—PART 1

For many people in the Northeast, fall is their favorite season. The crisp, cool nights and warm days, the kaleidoscope of tree colors, the pumpkin patches and hayrides.

For gardeners, too, fall is the last chance to tackle essential lawn and garden tasks before winter kicks in. Not to mention an opportunity to complete those landscaping chores left undone from last spring.

So roll up your sleeves, put on a jacket, and grab your gardening gloves.  Maintaining and preparing your yard for the winter months ahead will reap nice rewards in 2013.

ESSENTIAL FALL “TO DO” LIST

Check out the fall tips below for the ones that apply to your garden.

  • Divide and multiply perennials
  • Overseed your lawn or start a new one
  • Plant a tree or bush
  • Rake up all leaves
  • Control weeds
  • Mulch and put your garden to bed for a long winter’s rest

Now let’s look at each task in more detail:

Perennials: Many perennial flowers as well as most springtime flowering bulbs (e.g. tulips, daffodils, crocuses, irises, etc.) can be divided and transplanted in the fall–New Jersey’s warm autumn soil helps them establish and develop good root growth before going dormant for the winter.

Check out the general method below:

1) Thoroughly water perennials you plan to divide. 2)  Dig up entire plant or clumps of bulbs with root ball intact, (having previously marked the location of bulbs when they bloomed). 3) Divide into smaller plants at the root ball with a sharp knife, pruners, spade, or even pitchfork. 4) Replant sections immediately in desired locations, making sure to mark new positions of bulbs. 5) Water well. 6) Mulch!

If you are unsure which types of perennials should be replanted in the fall—and which methods to use—check beforehand with online resources or your local landscape professional.

Lawn care: It’s easy to forget that grasses are also perennials. Generally, your lawn needs most TLC in spring and summer, and repair work and sustenance in the fall.

So take advantage of warm fall days and ample rainfall to overseed your lawn if you feel it hasn’t grown thick enough or has many bare patches due to blistering summer heat. Overseeding is exactly what it sounds like: sowing seed over existing grass.

Follow the basic steps below:

1) Mow your grass shorter than normal. 2) Rake up and bag all clippings. 3) Aerate the lawn with a “core aerator” (available from local rental centers). 4) Purchase the grass seed blend best suited for your lawn. 5) Use a fertilizer spreader set at the correct overseed rate to sew the seed. 6) Apply a starter fertilizer at the same time. 7) Use a fine spray to water your lawn, with several waterings per day, for several weeks (depending upon weather).

These steps will promote contact between seeds and soil and give your lawn the best chance of recovery.

Early fall is also one of the best times to start a new lawn. You can choose to lay sod—creating an almost “instant lawn”–or sew grass seed—which is cheaper and offers a wider variety of grass types than sod. Either way, you will need good soil preparation beforehand.

The instructions below describe the basic method for starting a new lawn by seeding:

1) Remove old lawn and/or weeds with a flat-bladed shovel or with a sod-cutter (after first applying an herbicide). 2) Have soil pH tested and adjust if necessary. 3) Break up compacted soil with a rototiller (available from rental center). 4) Using a spreader, spread fertilizer with high phosphorus content over soil. 5) Spread “soil conditioner” or compost over soil. 6) Use the rototiller to till the fertilizer and soil conditioner into soil. 7) Rake soil to level off lawn surface. 8) Use a roller (available from rental center) filled with water to finish leveling soil. Water soil lightly. 9) Using a seed spreader, spread ¼ recommended seed over entire lawn. Repeat times, using ¼ of the seed, making sure to push spreader in different directions. 10. Rake lightly, covering seed with thin layer of soil. 11. Roll lawn surface again, this time with empty roller. 12. Seeding is done! But you must keep seeds evenly moist, with fine spray of waterings of up to several times per day (depending on weather).

(This is the end of Part 1 in our series of landscaping and gardening tips for the fall. Be sure to contact your local landscaping professional for more specific information.)


Posted in Uncategorized | Leave a comment

Decorating Your Lawn and Porch for Fall

For many people, autumn is their favorite season. This can be a really fun time to decorate your yard and, if you like, your front porch. It doesn’t have to be just about Halloween. With the right fall landscaping, plants and flowers, you can create a beautiful autumn look that will roll perfectly right into Thanksgiving.

One idea is to place a couple of hay bales on the front lawn. Purchase potted mums in fall colors and set them on the hay bales with pumpkins and gourds. If you have room, you could put another hay bale on the porch to place your jack-o’-lantern on, or just an assortment of colorful gourds and pumpkins. Do you have some trees with pretty fall leaves? Trim off a few branches, tie them in a bundle and place them on your mailbox post or the post of your outdoor lamp. Use bright, autumn-toned ribbon to tie a bow around the branches. You can also do the same thing with cornstalks, which you can sometimes purchase from a local farmer or your home and garden store.

Do you have some leaves to rake? You could rake them into a big pile and then place a ghost or a scarecrow popping his head out of the leaves. Or maybe a skeleton. Another eye-catching way to use pumpkins is to line your driveway with small ones or place two large ones at the end of your driveway. Still another decorative trick is to create a little hay wagon. Use your child’s wagon. Gather the dried grass that you probably have around your lawn and place it in a heap in the wagon to look like hay. Of course it could blow away so you need to put a couple of gourds or pumpkins, or something else, in the wagon to hold the hay in place.

Adding small plants and flowers can give your front steps or porch a nice Autumn warmth. Ask your landscaping professional to recommend hearty fall plants that can remain outside through November, or colorful flowering plants that could be placed in your window facing the front lawn. You can also paint regular terra-cotta pots in fall colors like shades of brown, shades of orange, yellow and gold, dark red. If you are a little artistic, you can also paint a maple leaf or other fall scene on the pots. This can also be a great project for your children and their friends. Pinecones can be placed in a rustic looking basket and sat on your front porch. You can spray the pinecones with gold metallic paint or any fall color if you like. But they look pretty just the way they are. You might even have pinecones around your lawn that need picked up anyway!

You can make a wreath from pinecones and be ready for Christmas! You can even scatter leaves all over your porch floor. You don’t need to have new items for a lovely autumn porch. You can use things that are old, weathered, rusty—you might even find these things in a thrift shop or antique shop. Even just a pitchfork leaning in the corner of the porch with a little mound of hay beside it can be a nice touch. You could also place a pitchfork in or beside a bale of hay on your front lawn.

A cluster of colored Indian corn can be attached to your mailbox or mailbox post for another splash of autumn appeal. Look around your lawn—walk it with your spouse or children and be creative. Look for anything you could use in a decorative way, just by tying it up, placing it in something, gluing it or painting it. You’d be surprised what nature provides that you can use to decorate with! Have fun!


Posted in Uncategorized | Leave a comment